- No products in the cart.
Installation of Distinction steel siding
How do I install Distinction steel siding?
Discover professional tips and tricks for installing your exterior steel siding. We recommend a certain level of skill to perform this type of work. It will be useful for you to have on hand the necessary tools as well as your safety equipment. We are not responsible for the installation of your siding and we suggest that you also rely on the manufacturer installation guide.
Here are the steps to easily install your exterior siding.
1- Installation of the starter molding
The first step in installing exterior siding is installing the starter trim. It is very important to do this step like a professional. To perform this step you should make a laser reference line on your wall or from a level reference, such as on roof trusses or sill plates in new construction.
Then you need to screw the starter strip onto the slats. Make sure you have installed rodent molding before you begin installing the starter strip. If you must start on brick or another surface, you must install steel flashing to begin the installation. To know the correct starting measurement, install a piece of siding in a piece of starting molding, then measure the difference. Draw a chalk line afterwards.

2- Installation of moldings.
The second step is to complete the installation of the corner and j-mouldings. It is very important to do this step following the installation direction of the moldings.

For windows, always start at the bottom and finish at the top. The moldings must be overlapped as when installing the vinyl siding. Do not hesitate to put sealant in the interior joints of the moldings.

Drip molding must be installed above the window per building code. An air gap must be made between the coating and the drip molding, at the back we must put an anti-rodent molding. It is recommended to drill holes of at least 1/8" every 2' in the J moldings installed horizontally so that the water drains.

To install the corners, simply install them square with the corner of the house. Check with a level, or simply with your eye, if the corners are straight. We cut the corner 5/8 lower than the roof truss, to leave space for the vent or soffit molding.

3- Installing the siding boards
To perform the cutting of the steel coating, we recommend good quality sheet metal shears, the edge designed for the coating, a sheet metal shear or a nibbler for steel. Above all, do not use a grinding wheel to cut the coating because it will rust and the warranty will be void. Some people use a round saw with a blade for non-ferrous steel coating.
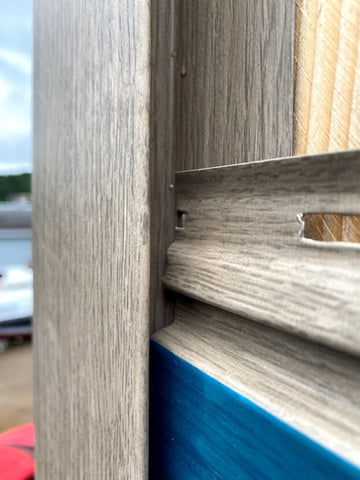
The Distinction steel liner comes in a cardboard box. Each plank is coated with blue plastic wrap. We recommend that you leave the film on until the plank is fixed to the wall, then you can remove it or wait a few rows. Don't expect too much, because it will be difficult to see if your boards are laid correctly or if the colors are right for you.

The first board can be difficult to tuck in. Just lean it toward you and pull up. Constant pressure must be maintained when screwing in the first row. Do not overtighten! You must screw so that the covering is solid and fixed to the wall, but do not fix the covering too tightly because it will warp. You must screw in each slat at 16" centers in the center. Then, you must install the covering, taking care to choose the numbers carefully. On large walls, you can install the covering as you see fit, taking care to Do not just put 3 or 4 boards of the same color. Leave a space of 1/8" between each board and do not hesitate to put 2 screws in the joints, one on each board to add strength to the joint.

When installing as an insert, you must be careful not to put the same numbers because this will be very visible. A good installation pattern when inserting is: 1,3,6,2,4,5 for example. The colors numbered 1 and 2 have the same hue, the 3-4 and the 5-6 too. Sometimes, when the siding is difficult to insert, we use a piece of wood to tap the plank to ensure that the plank is properly inserted and the joint is even.

It is essential to leave some looseness in the moldings. We leave about 1/4" spacing. This will allow the liner to move with temperature changes.

When installing the plank below and above openings such as a door or a window, we use the off-cuts of the plank as supports to it in order to avoid warping of the coating. For the last plank of the coating, we use the same technique. Just add sealant to the back to prevent the board from falling.


Voila, the coating is installed! Now all you have to do is pull the sealant joints over the openings and touch up the paint on the scratched boards. Don't forget to remove all the blue protection papers.
Buy your coating online with home delivery!
Now that you know how to install Le Distinction siding, do you have your equipment? We have everything you need to complete your project. We offer the sale of package coating, and also all moldings are available as well as steel rolls to bend certain moldings to measure. Our team offers delivery through our local suppliers, this way we can offer delivery in almost all regions of Quebec. Visit our Online Store now for more information.
